SSH (Secure Shell) is one of the most secure methods for remote access and management of IoT devices. Whether you're a beginner or an experienced developer, understanding how to use SSH for remote IoT setups is essential. This protocol allows you to securely connect to and manage devices located anywhere in the world, ensuring that sensitive data remains protected. As IoT continues to grow, the importance of SSH becomes more apparent.
In this guide, we will walk you through everything you need to know about using SSH for remote IoT management. From setting up SSH on your devices to troubleshooting common issues, this article aims to provide actionable insights and practical tips. If you're looking to enhance the security and efficiency of your IoT network, this is the perfect place to start.
By the end of this article, you will have a solid understanding of SSH and its role in remote IoT management. Let's dive in and explore how you can leverage SSH to take control of your IoT devices securely and efficiently.
Read also:Quiz Questions For The Elderly
Table of Contents
- Introduction to SSH
- Why SSH for Remote IoT Devices?
- Setting Up SSH on IoT Devices
- Connecting via SSH
- Securing Your SSH Connection
- Troubleshooting SSH Issues
- Advanced Features of SSH for IoT
- Best Practices for Using SSH with IoT
- Alternatives to SSH for IoT
- Conclusion and Next Steps
Introduction to SSH
SSH, or Secure Shell, is a cryptographic protocol designed for secure communication over unsecured networks. It provides a secure channel for remote command execution and file transfer between devices. For IoT devices, SSH is particularly useful because it ensures that all communication between the device and the remote server is encrypted, reducing the risk of unauthorized access.
SSH operates on port 22 by default and uses a client-server model. The SSH client connects to an SSH server running on the target device, allowing users to execute commands, transfer files, and manage configurations remotely. Its widespread adoption is due to its robust security features, ease of use, and compatibility with a wide range of operating systems.
Understanding the basics of SSH is crucial for anyone working with IoT devices. By mastering SSH, you can ensure that your devices remain secure and accessible from anywhere in the world.
Why SSH for Remote IoT Devices?
Security Benefits of SSH
One of the primary reasons SSH is preferred for remote IoT management is its strong security features. Unlike other protocols, SSH encrypts all data transmitted between the client and server, making it nearly impossible for attackers to intercept sensitive information. This encryption ensures that even if someone manages to intercept the communication, they won't be able to decipher the data without the appropriate keys.
SSH also supports authentication using public and private keys, which eliminates the need for passwords and reduces the risk of brute-force attacks. By using key-based authentication, you can further enhance the security of your IoT devices.
Efficiency and Reliability
Beyond security, SSH is known for its efficiency and reliability. It allows users to execute commands quickly and manage multiple devices simultaneously. This is particularly important for IoT setups where numerous devices may need to be monitored and controlled remotely.
Read also:Andrea Espada Sexy Pics
SSH also supports features like port forwarding and tunneling, which can be used to create secure connections between devices located behind firewalls or NATs. This makes it an ideal choice for IoT networks that span multiple locations.
Setting Up SSH on IoT Devices
Enabling SSH on Your IoT Device
Before you can use SSH to manage your IoT devices, you need to ensure that SSH is enabled on the target device. Most modern IoT devices come with SSH pre-installed, but it may be disabled by default for security reasons. To enable SSH, follow these steps:
- Access the device's configuration interface via a local network connection.
- Locate the SSH settings and enable the service.
- Set a strong password or configure key-based authentication for added security.
Once SSH is enabled, your device will be ready to accept remote connections.
Configuring SSH Settings
After enabling SSH, you may want to customize its settings to suit your specific needs. Some common configurations include:
- Changing the default port (22) to a custom port for added security.
- Disabling password authentication and requiring key-based authentication only.
- Limiting access to specific IP addresses or networks.
By fine-tuning these settings, you can further enhance the security and usability of your SSH setup.
Connecting via SSH
Using SSH Clients
To connect to your IoT device via SSH, you will need an SSH client. Popular SSH clients include:
- OpenSSH: A widely used open-source SSH client available on most Linux and macOS systems.
- PuTTY: A popular SSH client for Windows users.
- Mobile SSH Apps: Available for both iOS and Android devices, allowing you to manage IoT devices on the go.
Choose the client that best suits your operating system and preferences.
Establishing the Connection
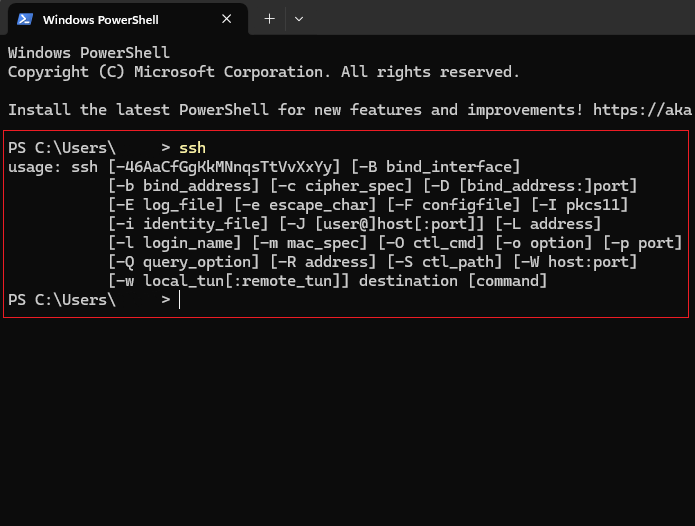
Once you have an SSH client installed, you can establish a connection to your IoT device using the following command:
ssh username@device_ip_address
Replace "username" with the appropriate username for your device and "device_ip_address" with the IP address of your IoT device. If you've configured a custom port, include it in the command like this:
ssh -p custom_port username@device_ip_address
Securing Your SSH Connection
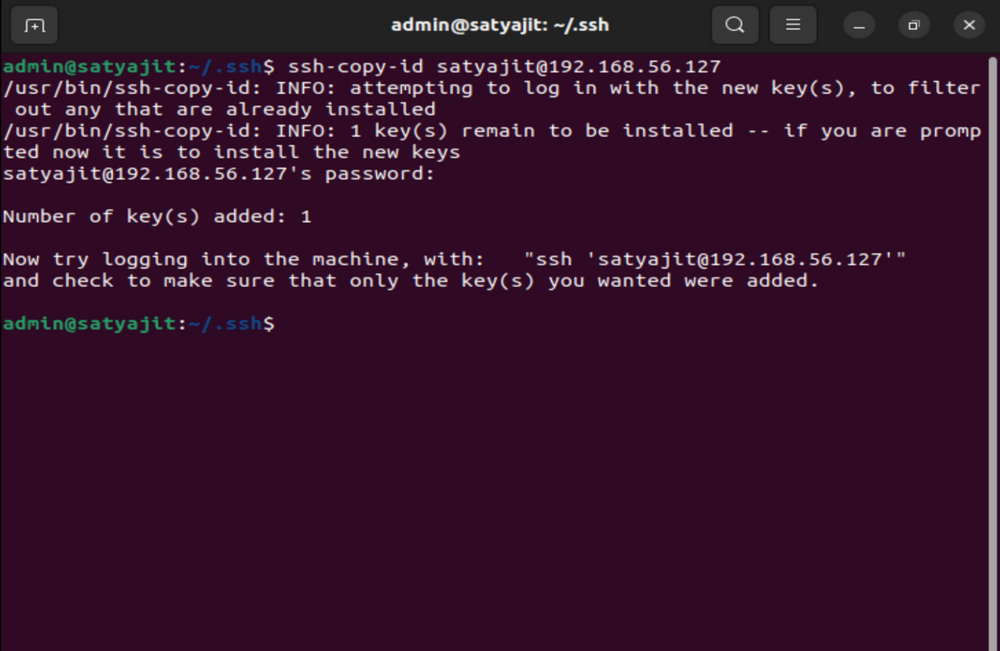
Implementing Key-Based Authentication
Key-based authentication is one of the most effective ways to secure your SSH connections. Instead of relying on passwords, which can be easily guessed or brute-forced, key-based authentication uses cryptographic keys to verify the identity of users.
To set up key-based authentication, follow these steps:
- Generate a public-private key pair using an SSH client.
- Copy the public key to the authorized_keys file on the IoT device.
- Disable password authentication in the SSH configuration file.
This process ensures that only users with the correct private key can access your IoT devices.
Firewall and Network Security
In addition to key-based authentication, you should also consider implementing firewall rules and network security measures to protect your SSH connections. Limiting access to specific IP addresses or using a virtual private network (VPN) can further enhance the security of your IoT network.
Troubleshooting SSH Issues
Common Problems and Solutions
Even with proper configuration, SSH connections can sometimes fail due to various reasons. Here are some common issues and their solutions:
- Connection Refused: Ensure that SSH is enabled on the device and that the correct IP address and port are being used.
- Authentication Failed: Double-check your username, password, or key file to ensure they are correct.
- Timeout Errors: Verify that there are no firewall or network issues blocking the connection.
By addressing these issues promptly, you can maintain a stable and secure SSH connection to your IoT devices.
Advanced Features of SSH for IoT
SSH Tunneling
SSH tunneling allows you to create secure connections between devices located behind firewalls or NATs. This feature is particularly useful for IoT setups where devices may not have public IP addresses. By setting up an SSH tunnel, you can securely access and manage your IoT devices from anywhere in the world.
Automating Tasks with SSH
SSH can also be used to automate routine tasks on your IoT devices. By writing scripts that execute commands over SSH, you can streamline the management of your IoT network and reduce the need for manual intervention.
Best Practices for Using SSH with IoT
To ensure the best possible experience when using SSH for remote IoT management, consider the following best practices:
- Regularly update your SSH client and server software to protect against vulnerabilities.
- Use strong, unique passwords or key-based authentication for all devices.
- Monitor SSH logs for any suspicious activity and investigate potential security breaches promptly.
By adhering to these practices, you can maintain a secure and efficient SSH setup for your IoT devices.
Alternatives to SSH for IoT
Other Protocols for Remote Access
While SSH is the most widely used protocol for remote IoT management, there are other options available. Some alternatives include:
- HTTPS: Provides secure web-based access to IoT devices.
- Telnet: An older protocol that offers faster connections but lacks encryption.
- MQTT: A lightweight protocol designed specifically for IoT applications.
Each protocol has its own advantages and disadvantages, so it's important to choose the one that best fits your needs.
Conclusion and Next Steps
In conclusion, SSH is an invaluable tool for managing remote IoT devices securely and efficiently. By understanding its features and implementing best practices, you can ensure that your IoT network remains protected from unauthorized access and potential threats. Whether you're setting up SSH for the first time or looking to improve your existing setup, this guide provides the information you need to succeed.
We invite you to share your thoughts and experiences in the comments below. Have you used SSH for remote IoT management? What challenges did you face, and how did you overcome them? Your feedback helps us improve and provides valuable insights for other readers.
Don't forget to explore our other articles for more tips and tricks on IoT and cybersecurity. Together, let's build a safer and more connected world!