Raspberry Pi VPC network example has become a popular topic among tech enthusiasts who want to explore virtual private clouds (VPCs) using affordable hardware. If you're looking to set up your own VPC network using Raspberry Pi, this guide is designed to walk you through the entire process step by step. Whether you're a beginner or an advanced user, understanding the basics of VPC and how Raspberry Pi fits into the equation will help you create a robust and secure network environment.
In today's digital age, having control over your network infrastructure is crucial. With the increasing demand for secure and scalable networks, Raspberry Pi offers an excellent platform for experimenting with VPC configurations. This article will provide you with all the necessary information to build your Raspberry Pi VPC network, from setup to advanced configurations.
From understanding the fundamentals of VPC to troubleshooting common issues, this guide ensures you have a solid foundation to work with. Let's dive into the world of Raspberry Pi VPC networks and explore how you can make the most out of this versatile device.
Read also:Montana Jordan Salary
Table of Contents
- Introduction to VPC
- Raspberry Pi Overview
- Setting Up Raspberry Pi for VPC
- Basic VPC Configuration
- Advanced VPC Features
- Security Best Practices
- Troubleshooting Common Issues
- Use Cases for Raspberry Pi VPC
- Raspberry Pi VPC Network Example
- Conclusion and Next Steps
Introduction to VPC
A virtual private cloud (VPC) is a network environment that allows you to create isolated, secure, and scalable environments within the cloud. VPCs are widely used by businesses and individuals alike to manage resources, enhance security, and optimize performance. In this section, we'll explore the basics of VPC and why it's essential for modern networking.
Why Use VPC?
- Enhanced security through isolation
- Flexibility in resource management
- Scalability for growing infrastructure
- Customizable network configurations
Raspberry Pi Overview
Raspberry Pi is a small, affordable computer that has gained immense popularity among hobbyists, educators, and professionals. It's a versatile device that can be used for a wide range of applications, from home automation to cloud computing. In the context of VPC, Raspberry Pi serves as an excellent platform for experimenting with network configurations and learning the fundamentals of cloud computing.
Key Features of Raspberry Pi
- Compact size and low power consumption
- Support for multiple operating systems
- Extensive community support and resources
- Cost-effective solution for DIY projects
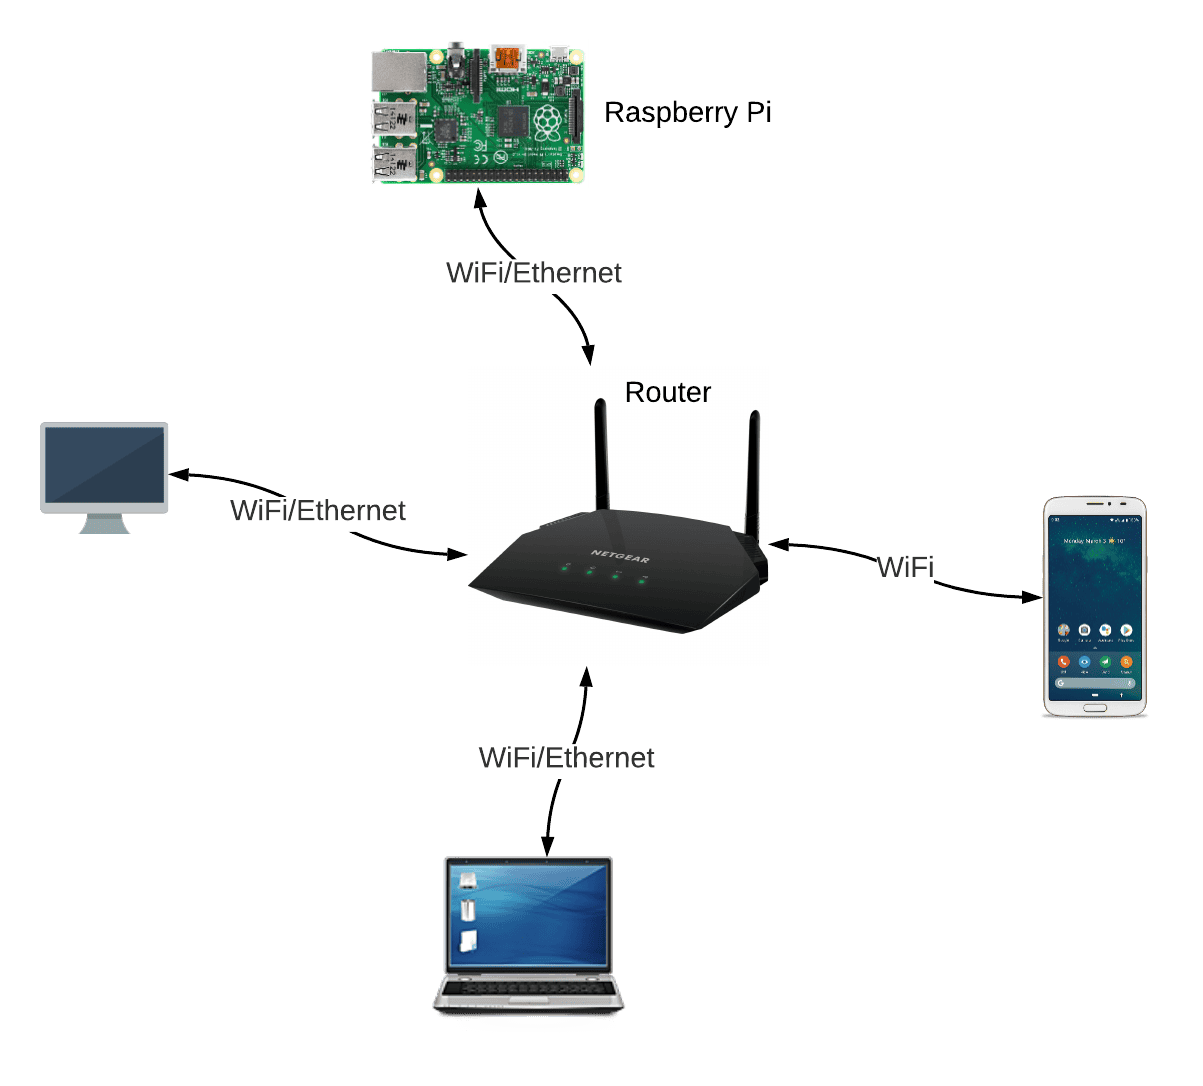
Setting Up Raspberry Pi for VPC
Before diving into VPC configurations, it's essential to set up your Raspberry Pi properly. This section will guide you through the initial setup process, ensuring your device is ready for advanced networking tasks.
Step-by-Step Setup Guide
- Install the latest version of Raspberry Pi OS
- Configure Wi-Fi or Ethernet connection
- Update the system using
sudo apt updateandsudo apt upgrade - Enable SSH for remote access
Basic VPC Configuration
Once your Raspberry Pi is set up, it's time to configure the basic VPC network. This involves setting up subnets, routing tables, and security groups to ensure a secure and functional network environment.
Creating Subnets
Subnets are essential components of any VPC network. They allow you to divide your network into smaller segments, improving security and performance. To create subnets on Raspberry Pi:
Read also:Crescent University Nigeria
- Define the IP address range for each subnet
- Configure the subnet mask and gateway
- Assign devices to specific subnets based on their roles
Advanced VPC Features
After mastering the basics, you can explore advanced VPC features such as NAT gateways, load balancers, and DNS services. These features enhance the functionality of your Raspberry Pi VPC network and make it suitable for more complex applications.
Implementing NAT Gateways
A NAT gateway allows devices within your VPC to access the internet while remaining isolated from external networks. To set up a NAT gateway on Raspberry Pi:
- Install and configure iptables
- Set up masquerading rules for outbound traffic
- Test the NAT gateway to ensure proper functionality
Security Best Practices
Security is a critical aspect of any VPC network. By implementing best practices, you can protect your Raspberry Pi VPC from unauthorized access and potential threats.
Key Security Measures
- Use strong passwords and two-factor authentication
- Regularly update software and firmware
- Monitor network activity for suspicious behavior
- Encrypt sensitive data and communications
Troubleshooting Common Issues
Even with proper setup and configuration, issues can arise in your Raspberry Pi VPC network. This section provides solutions to common problems and tips for effective troubleshooting.
Common Issues and Solutions
- No internet connectivity: Check network settings and ensure proper configuration of subnets and gateways.
- Device unreachable: Verify SSH settings and ensure firewall rules allow remote access.
- Performance issues: Optimize resource allocation and monitor system performance.
Use Cases for Raspberry Pi VPC
Raspberry Pi VPC networks have numerous applications across various industries. From educational institutions to small businesses, the versatility of Raspberry Pi makes it an ideal choice for experimenting with VPC configurations.
Popular Use Cases
- Home automation and IoT networks
- Development and testing environments
- Cloud storage and backup solutions
- Custom network appliances
Raspberry Pi VPC Network Example
To illustrate the concepts discussed in this guide, let's walk through a practical example of setting up a Raspberry Pi VPC network. This example will cover the entire process, from initial setup to advanced configurations.
Example Setup
- Install Raspberry Pi OS and configure basic settings
- Create subnets for different network segments
- Set up a NAT gateway for internet access
- Implement security measures such as firewalls and encryption
Conclusion and Next Steps
Raspberry Pi VPC network example demonstrates the potential of this versatile device in creating secure and scalable network environments. By following the steps outlined in this guide, you can build your own VPC network and explore advanced networking concepts.
Key Takeaways:
- VPC networks provide enhanced security and flexibility for modern infrastructure
- Raspberry Pi is an excellent platform for experimenting with VPC configurations
- Implementing best practices ensures a secure and reliable network environment
We encourage you to share your experiences and ask questions in the comments section below. For more articles on Raspberry Pi and networking, explore our website and stay updated with the latest trends in technology.
References: